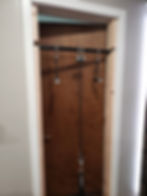
In today's post, I'll share with you how to make a simple DIY doorway pull up bar. If you've got the right accessories, you can turn it into a decent exercise station. If you're not interested in the story of why I even had to make one, then you can skip the background info and go straight to the INSTRUCTIONS below!
I spent days trying to find an over the door pull-up bar that would fit my door. Unfortunately, I live in an older home and the door I planned to use is in a load bearing wall. Doorway pull-up bars come in two styles:
Over-the-Door
Tension Rod
The problem with most over-the-door bars is that they are limited to 6" wide door frames, which works fine for newer homes but not so much in my situation where the thickness at the frame is over 7". The problem with tension rod styles is that I just don't trust them :) So, I came up with my own solution that you can use if you have a similar situation or want something a little bit more robust.
INSTRUCTIONS
Below are the materials, tools, measurements, and steps you will need to make this pull up bar.
Materials
Two (2) 2x4 Dimensional Lumber Cuts - The wood and finish of the piece of lumber should be based on whether you will be finishing with paint, stain, or leaving au naturel. The length of lumber should be cut based on measurements taken below.
One (1) nominal 1 inch piece of schedule 40 pipe - The length of pipe should based on measurements taken below.
Multiple pieces of adhesive felt.
Measurements
Measure the vertical distance from the floor to the top of the door jamb lining/casing. Measure on both sides of the casing in case there is a slight deviation between the two sides. This dimension, or dimensions, will be used to determine the length of your 2x4 lumber cuts. If you have a threshold or transition piece where the 2x4's will stand, you may need to make additional measurements and cuts.
Measure the horizontal distance between the door jamb lining/casing. This dimension will be used to determine the length of your pipe.
Measure the height of your head and add another inch for safety. This dimension will be used to determine where the pipe should be placed in it's final position.

Tools
You'll need something that can make a hole that is just a bit larger than the size of pipe. Nominal 1 inch schedule 40 pipe has an outer diameter of 1.315 inches. I went with a cordless hand drill and 1-3/8" forstner bit, although a spade bit will work too.
You'll need something you can cut with to make a slot in the 2x4. I just used a regular hand saw.
You'll need some files and sand paper to smooth out the slot.
Steps
Cut the length of 2x4 lumber based on dimension 1 noted above minus 1/4" for some tolerance.
Purchase 1" nominal schedule 40 pipe with a maximum length matching dimension 2 noted above. You may need to cut the pipe down to length if the width of your door doesn't match the size of available pipe at your local hardware store.
Drill a hole in the 2x4 based on dimension 3 noted above and centered along the width of the 2x4.
Make a notch in each 2x4 using a saw. Smooth out the notches to your heart's desire using files and sand paper. At minimum, keep filing and sanding until you can slide the pipe into and out of the slot with minimal resistance. I used an offset of 3/4" to determine the starting point of my notch, but you can use a shallower or steeper offset depending on how you want it to look and function. The shallower the offset, the easier it will be for the bar to come out.
Add felt to each end of the 2x4 to protect your floor and door casing while also providing a friction fit to hold your 2x4's in place. If the 2x4's don't stay in place snuggly, add another layer of felt to the top of the 2x4 and try again until you achieve the desired fit.
Slide the pipe into the slots and enjoy!


FINAL PRODUCT
And there you have it, everything needed to create an simple DIY doorway pull up bar! Get yourself some accessories from FitBar and turn your doorway into an exercise station!

THANK YOU!
If you found this post helpful, be sure to like, share or comment below! If you have other ideas or upgrades, definitely share in the comments below!
